Thursday, June 30, 2011

Recycled coffee can 4th of July windsocks


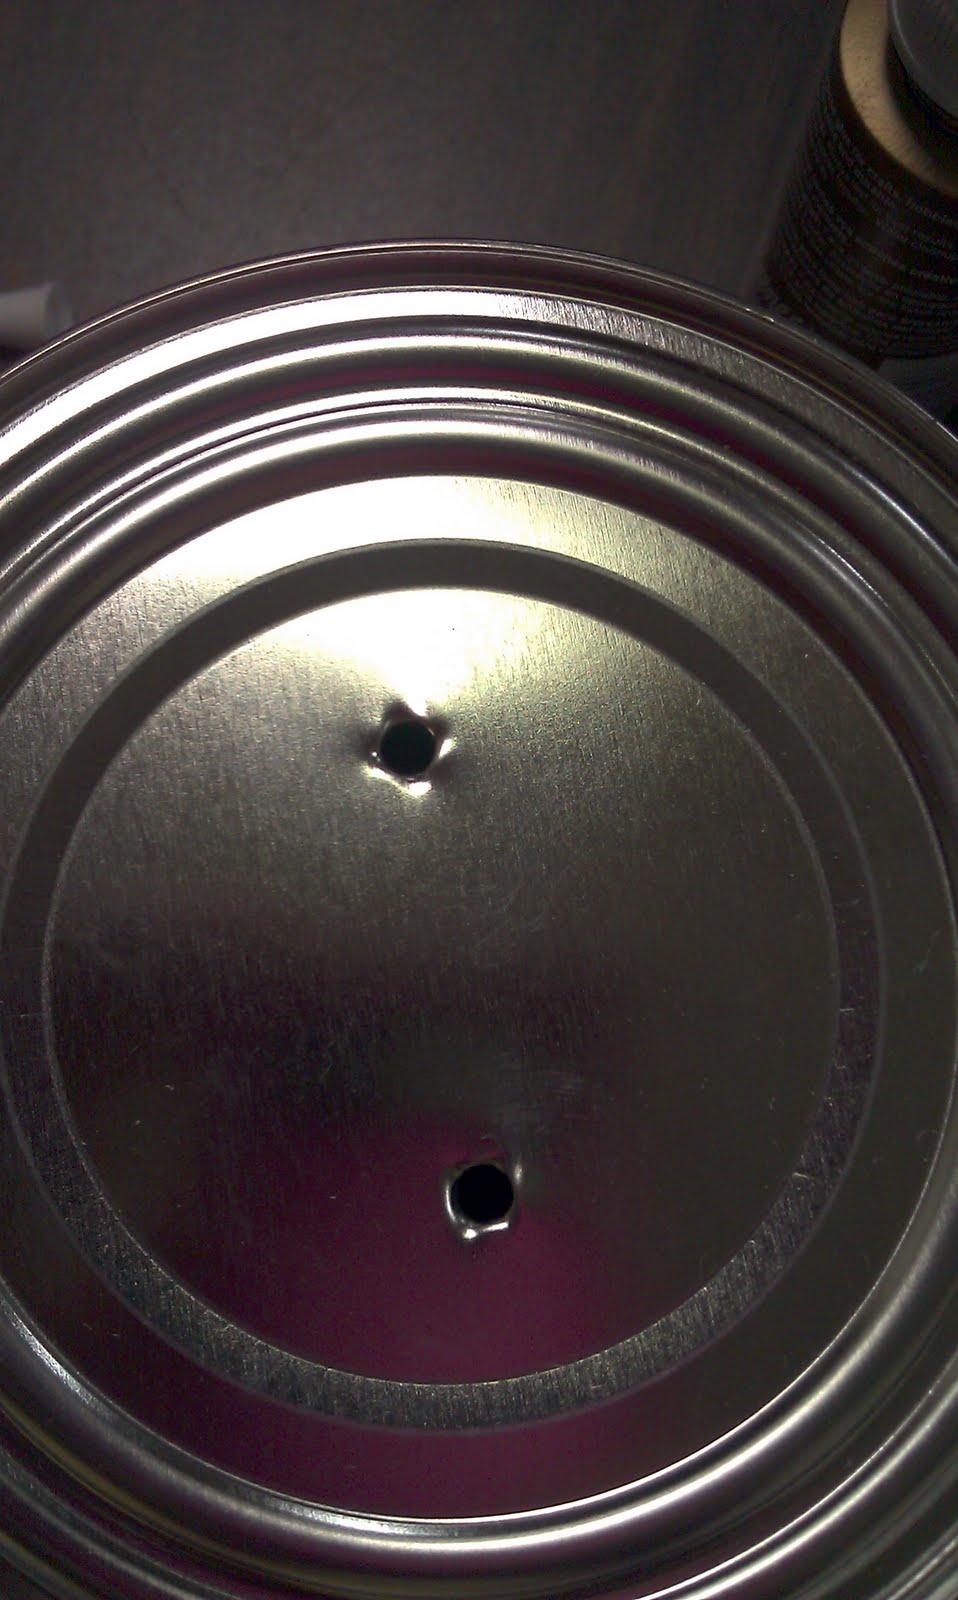
As most of you saw yesterday, I found some wonderfully easy tin can 4th of July wind socks.  I fell in love and immediately started planing on how to make them for this weekend.  I am not very good at spray paint, which means I get it every where but the object I am trying to paint. I decided on wrapping the cans with paper. I already had 4 recycled coffee cans sitting in my basement just waiting to be used for something.  So on my way home from work I dropped by the Dollar Tree and picked up some shimmery red paper and some red, white and blue ribbon.  First I poked holes in the bottom of the cans with a hammer and nail, I made two in each can. 


Then I measured the cans and cut the paper to fit between the rims.  I used my favorite glue, Aleene's tacky glue to make a ring around the top and bottom of the can and pressed the paper to it.


Next I cut each roll of ribbon into 12" pieces, sorted the pieces so I had enough to make a pattern on each can and hot glued them inside. 


Than I just cut some twine to hang them, threaded it into the holes I punched at first and knotted it inside the can.   TA-DA!!!!  beautiful recycled coffee can windsock.   

I love the way they turned out.  I really can't wait to hang them outside. 


Wednesday, June 29, 2011

4th of July coffee can windsocks

So yesterday I was playing on Pinterest and found these really cute tin can windsocks


I love them.  I have a few old coffee can's laying around at home.  I am thinking of covering them with paper and picking up some ribbon at the dollar store. 


Guess what I'm going to be making today?  hahaa!!!

Directions and pictures to come.........

Friday, June 24, 2011

4th of July paper star wreath


So here's how I did it. 

First I traced a large bowl onto a piece of cardboard and cut it out.  Then I traced a smaller bowl inside the center of the circle and cut it out.  Ta-Da! Very cheap wreath form.  You all know you have some cardboard laying around the house somewhere. 

I am not very good with a razor blade but no one is ever going to see this part anyways. 


Then it was time to start cutting out the stars.  I have this wonderful machine called a Cricut that I could have used to cut them out but I decided I would just cut them out by hand. 

I cut a star template out of card stock


Then I cut the stars out of scrapbook papers.  You could use wrapping paper but I thought they would have more shape with a thicker paper.  I chose three patterns and two solid colors. 

I do not own a scoring tool so I just folded my stars at in the center of each point, matching the sides.  Just fold in half all the way around.  Wait does that make any sense?   You just want the points to have mountain folds and the insides to have valley folds.  Like this:


I used 13 for the wreath.  Then I cut some flat stars out of gold and white paper with the same template I used for the 3-D stars.  I glued all the flat stars to the cardboard wreath form using Aeene's tacky glue. (btw- I love this tacky glue! I use it for everything)  Next I used hot glue to glue the 3-D stars on top of the flat stars.  One dab on the back in every valley fold, then just lightly pressed onto the white stars.      

Continue gluing until you have covered the whole wreath.  I decided I wanted something "more" on my wreath and made 3 extra 3-D stars and glued them to pipe cleaners and attached to the back of the wreath. 

TA-DA!!!!!

Finished!


Thursday, June 23, 2011

The spring paper flower topiary........

that turned into a summer paper flower topiary. 

Well I finally finished it.  I have had it about a quarter of the way done for a while now and finally pulled it out of the corner it has been hiding and finished it.  This took allot more time than I thought.  The roses were easy if you only had to make a few, but you need allot to cover a 9" foam ball.  I love the way it turned out though and would defiantly make another one if I had the space to put it. 

Might just have to make one for the fall.......oranges, reds and brown.  Ohh.....I guess I better start it now if I want to get it done in time.

OK, here's the picture of it finished.


I got the milk jug from Micheal's, it fits with my decor at home.  I think this would look great in a clay pot too! 

I posted about this in march.  I found the idea from Bits of me....the craft mom. 
Here's a link to hers

4th of july star wreath

So I decided to browse this morning for 4th of July decorations.  I know, I know I have TONS of time before the 4th of July. Hahaaaa!!!  Well we have this party every year and I never decorate and this year I feel like doing a little something at least.  I stumbled across this beautiful paper star wreath on Little Birdie Secrets.  Easy and in my decorating budget (which is very very small) Good thing I have everything to make this at home.  I am going to use Dark barn red and blue papers.  Maybe even some red and white stripes or how about flag design......OK maybe I will be making a trip to the craft store to look at paper.   


Check out her blog for the directions!


I will post pictures of mine as soon as I finsh it. 

Monday, June 13, 2011

Dutch Oven cooking

I love to cook in my dutch ovens!!!  My beautiful mother in law has given me two as gifts the last few years, they are Red enameled cast iron and are so much fun to cook in.  Everything tastes better out of a red pot!   

My good friend Kyle bought me the one I use camping, I think it has been 10 years since I first started using it.  I only make a few recipes in my camping dutch oven and have been hunting for something new to try.  I used it over Easter weekend to make RoundyRounds monkey bread.  Here's her recipe: http://roundyrounds.blogspot.com/2010/10/dutch-oven-recipes.html  it is to die for!!!   

So this coming weekend the hubby and I will be loading up the dog and heading out camping with two good friends.  I am thinking of making this....

Mexican Chicken


2 cups corn tortilla chips (slightly broken)


2-1/2 cups cooked chicken, diced


1 cup sour cream


1 (10-3/4 oz.) can cream of chicken soup, undiluted


1 (4 oz.) can green chilies, diced and peeled


1 onion, chopped


1 cup Monterey Jack Cheese, grated


2 (6 oz.) packages yellow cornbread mix


1 cup cheddar cheese, grated


Make cornbread with milk, following instructions on package. Add cheddar cheese to mix.


Combine sour cream, soup, chilies, onions and chicken in a separate bowl.


Cover bottom of 12" Dutch oven with broken tortilla chips. Sprinkle Monterey Jack Cheese over the chips. Spread chicken and sour cream mixture over chips. Carefully spread cornbread batter over chicken and sour cream mixture. Bake at 400 degrees (19 coals on top and 10 on bottom) for 25 to 30 minutes, or until golden brown.


I will let you know how it turns out. 

6-23-11

It turned out sooooo GOOD!!!!!  We used skotidakis jalapeno yogurt dip instead of the sour cream and I seasoned the chicken with cumin, chili powder and garlic when I cooked it.  I also doubled the cheese, cause I LOVE cheese.  This was the perfect dinner for a cold night camping.  I will be making it again.